


TABLE OF CONTENTS

FOLLOW
If you are using Webflow CMS to manage your website, you may have old or outdated items that you want to archive to keep your content organized. Archiving is the process of moving items from the active site to an archive site. In this blog, we will discuss how to automatically archive your Webflow CMS items.
Archiving from the Webflow CMS
Why Archive CMS Items?
Archiving CMS items is essential for keeping your website up-to-date and organized. Outdated job listings, events, promotions or content with expiry dates, and any other irrelevant information can clutter your website and make it difficult for users to find what they need. By archiving these items, you can keep your website clean and easily accessible for users.
There are many reasons why removing old CMS data automatically might be useful to your site. It can:
- Ensure that the information is relevant or valuable to visitors to your site.
- Prevent visitors from receiving inaccurate information.
- Offering one-off or time-sensitive opportunities.
- Standardizing how information is stored for future analysis.
How to Create an Automated CMS Archive Workflow in Make
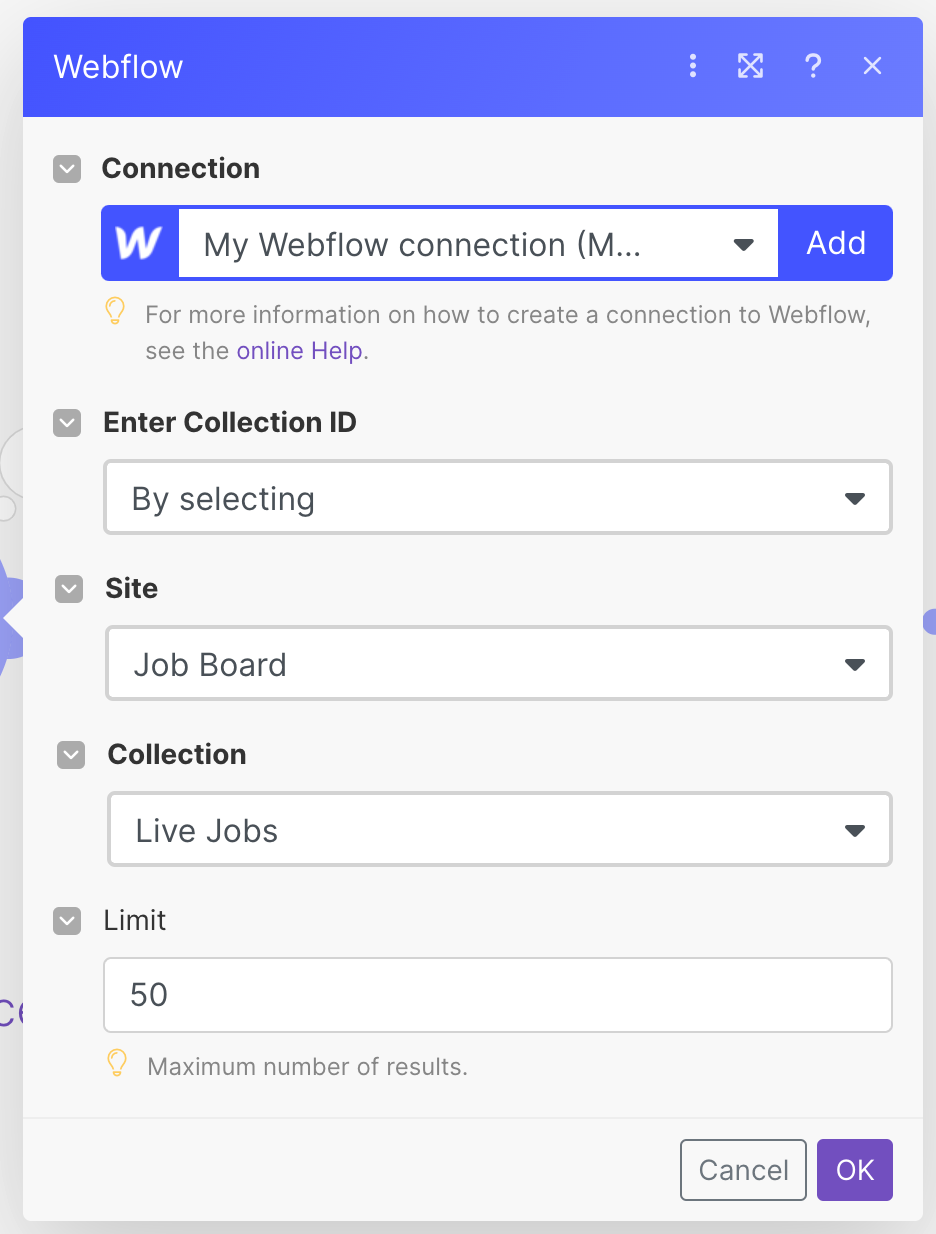
Step 1. Create a “List items” module.
Create a list item module that periodically grabs some number of the most recent items in your CMS collection. Make sure this number (the “Limit”) reflects the number of items being posted into the CMS collection. Set this up to run as often as makes sense with your Make plan and the amount that is being posted.
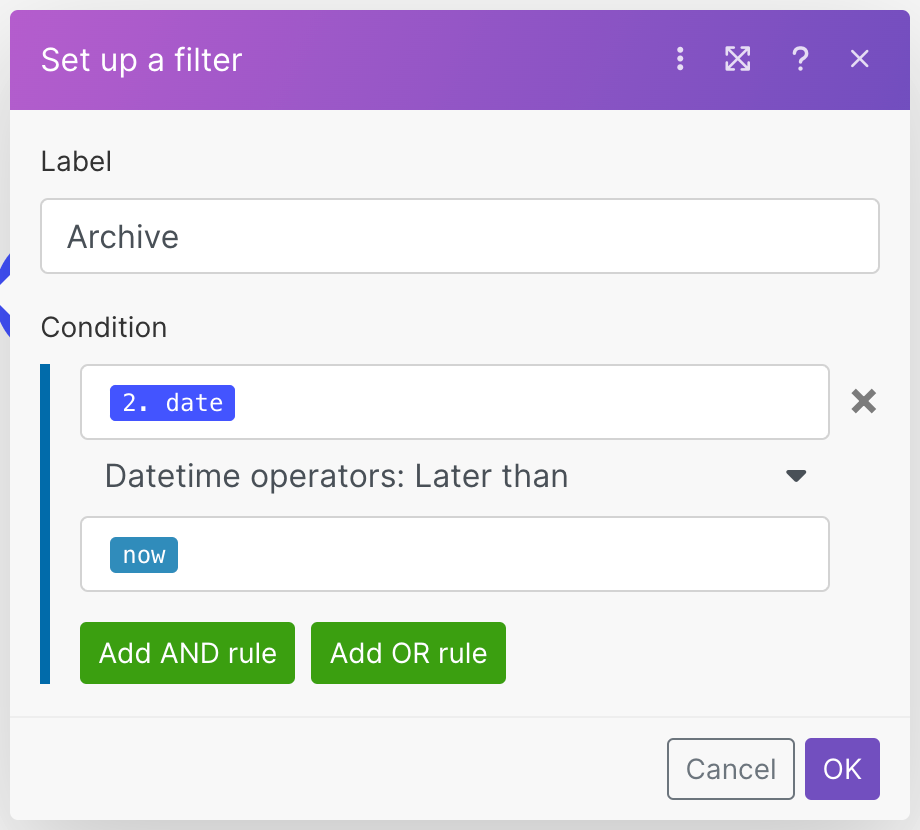
Step 2. Set up a filter with a datetime filter.
Create a filter that filters on the condition date (which might not be a relevant date to the item itself, but rather the date that you want the item to be archived on). If the job posting does have a relevant date (the date the job was posted, for example), you can modify the datetime operator to happen X days after that date. This can be done using the a [now] + X operator.
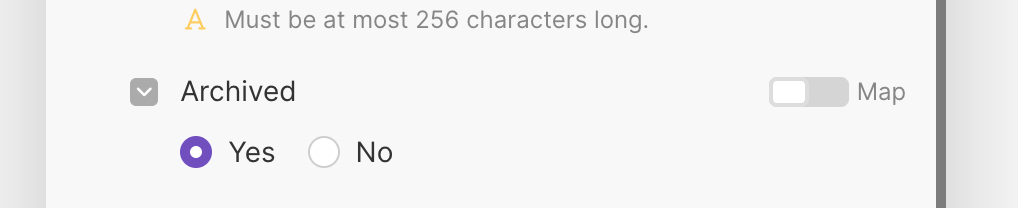
Step 3: Set up an “Update an item” module.
Create an “Update an item” module that toggles the “Archived” field to “Yes”. This will move the item from a live state into an archived state that can will remove it from your site, while still keeping it visible to you in your CMS collection.
This is a very simple process that only requires two relatively simple modules.
However, this does mean that you will not be able to display to customers items that have been previously updated. If you want to create a displayable archive system, I’ve described that process below.
How to Automatically Archive (and Displayable) CMS Items in Make
Sometimes you will want to display archived items in another spot on your site. This is a good way to demonstrate previous activity on your site and build trust in the value of following along with whatever is being offered.
Here is how you can build an automated archive system that can be displayed on another site.
Step 1: Create an Archive Collection
First, you need to create an Archive Collection in your Webflow CMS. This collection will hold all the items that you want to archive. To create an Archive Collection, follow these steps:
- Login to your Webflow account and open the site that you want to archive items for.
- Click on the "Collections" tab in the left-hand menu.
- Click on the "Add Collection" button and name the collection "Archive".
- Add the same fields to the Archive Collection as you have in your main collection.
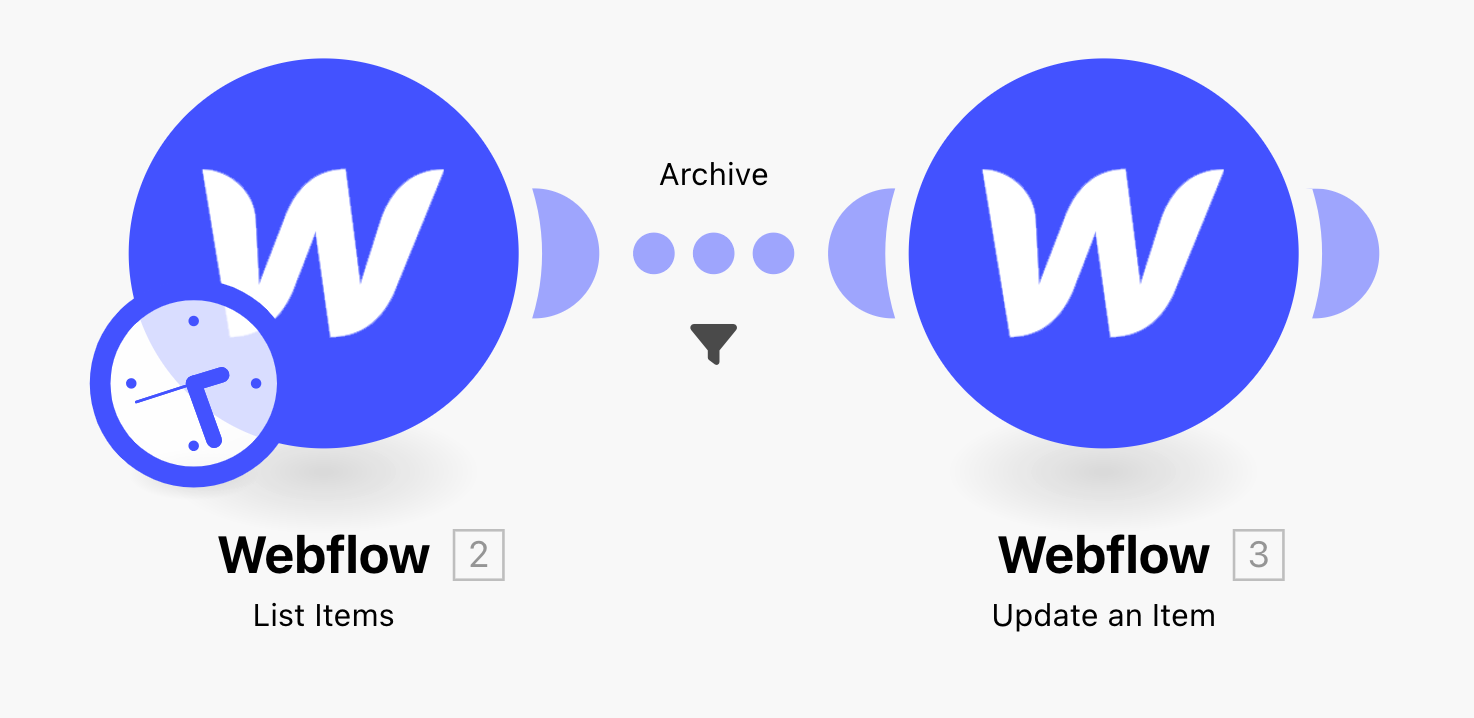
Step 2: Create a workflow in Make
The next step is to create a workflow in Make that will automatically move items from your main collection to the Archive Collection. These steps assume that you have already made an account on Make (www.make.com) but does not require extensive knowledge of how the platform works. To create this workflow, follow these steps:
1. Create a new scenario in Make and choose "Webflow" as the first trigger app.
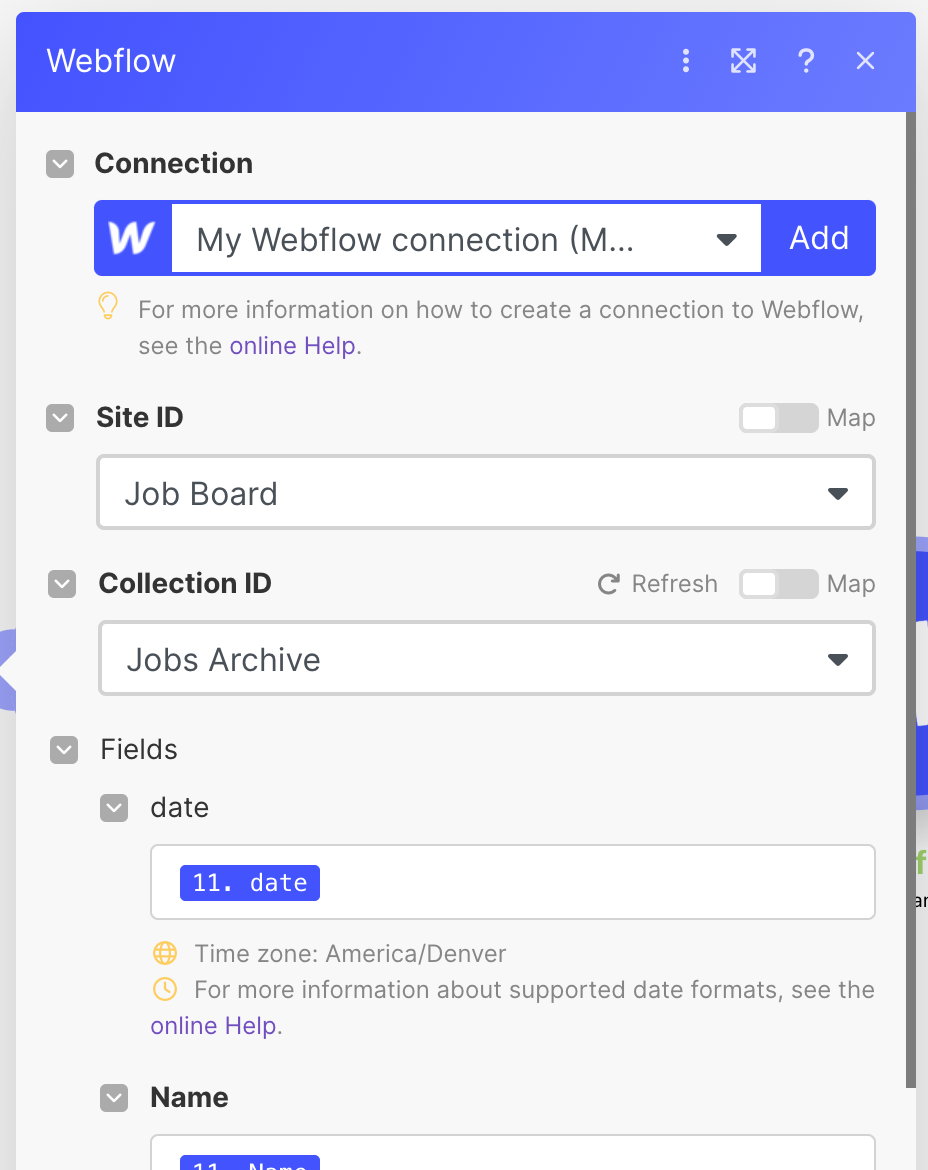
2. As above, add the "List items" trigger module to your scenario, and configure it to retrieve the CMS items you want to archive. Here, I’ve created a sample jobs board in Webflow and named the collection “Live Jobs”.
3. Connect another Webflow module with the task to “Create a new item”. Make the Collection ID that of the Archive Collection created in Step 1. Match the fields from the original collection and the archive collection.
4. Add a "Filter" module to the link between the two modules, and configure it to only allow items that meet certain archive criteria to continue to the next step. In this example, I’ve set it to any time later than an arbitrary “date” variable that I’ve attached to each job. It is assumed that this “date” variable is the time after which you want the Job to be archived.

*Make sure to use a “datetime” operator for date-based filtering (and not a time operator).
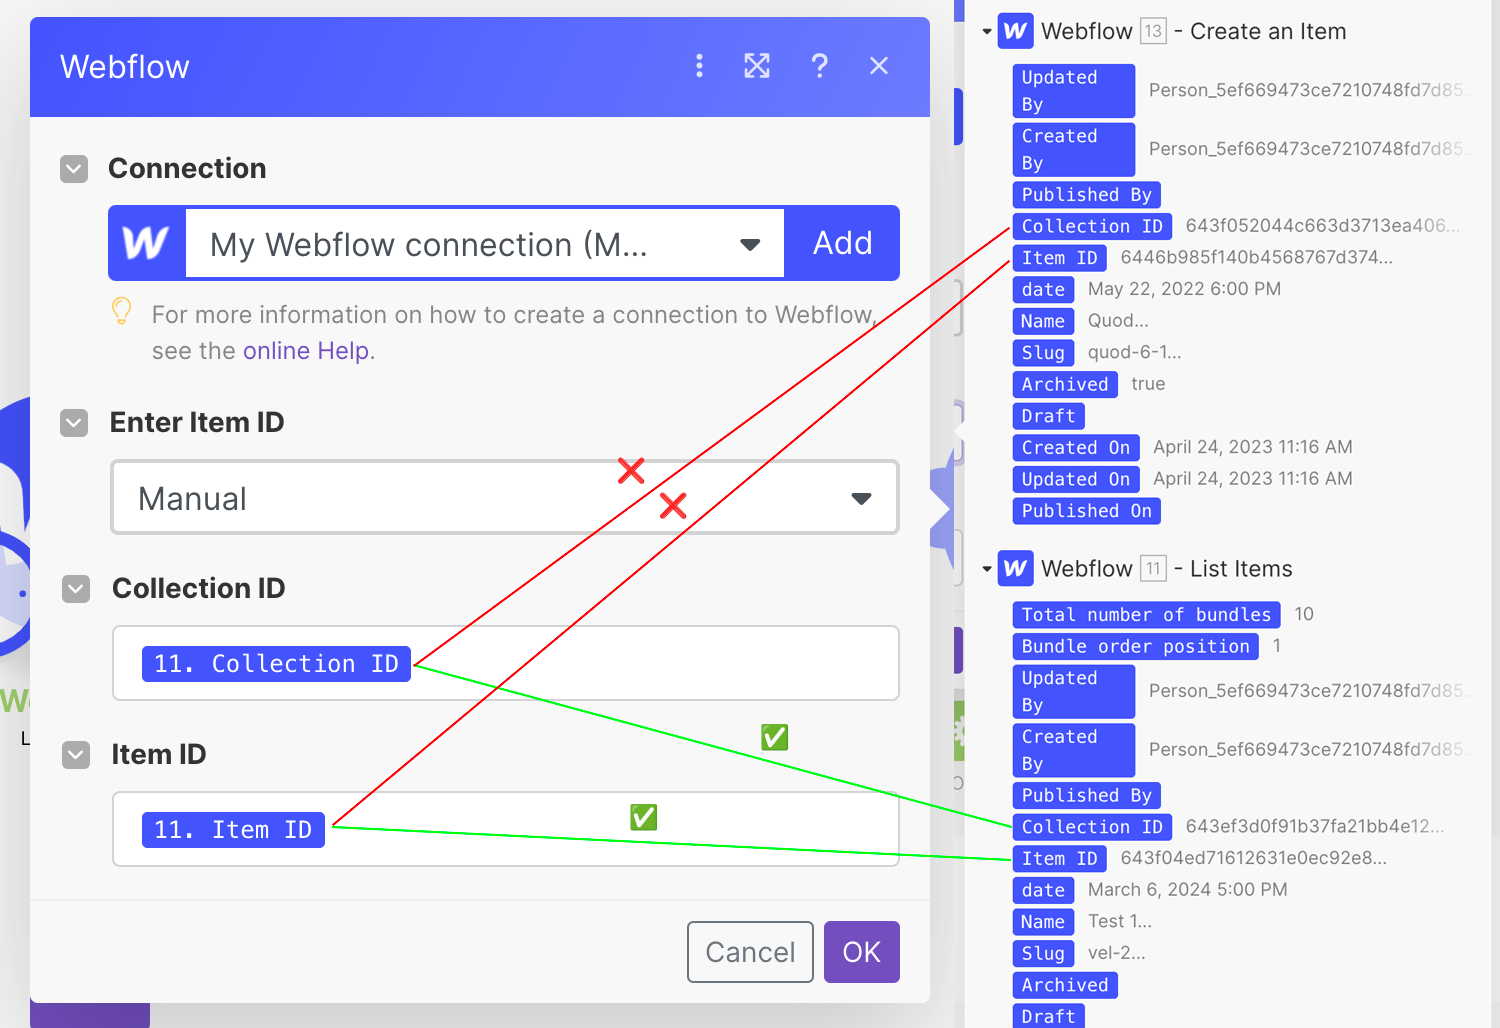
5. Finally, create a “Delete an Item” Webflow module and connect it to the “Create an Item” module. Make sure the Collection ID and Item ID reference the ID that was used in the original “List Items” module (and not the “Create new Item one).
6. Run a test of your workflow. If everything is working properly, you should be able to see real-time changes in the Webflow designer.

Now, every time a new item is added to your main collection, Make will automatically create a copy of the item in your Archive Collection and delete the original from the live Jobs board. This will keep your main collection clean and organized while still keeping all your old items easily accessible.
CMS Archive Examples
Job Boards
On job boards, up-to-date information is of importance. Job seekers rely heavily on the information provided by these platforms to make informed decisions about employment opportunities. When job postings contain outdated or inaccurate information, it can lead to confusion and frustration for job seekers. It can reflect poorly on the employer too, who may appear disorganized or unprofessional.
As a job board accumulates a large number of job openings, it becomes necessary to archive older listings to keep the platform organized and ensure that job seekers are presented with the most relevant and up-to-date opportunities. There are several criteria by which jobs on a job board can be archived, including:
- Automatically removing listings after a certain period of time (e.g., 30 days).
- Offering the option for employers to purchase periods of time on the job board.
- Connecting CMS Collection to external database/spreadsheet which contains information about the job.
- Manually archiving jobs once they’ve been filled.
In the first two instances adding a [CODEBLOCK] (datetime) filter will be enough to automatically archive job postings that are past a certain date. If you’d like to archive posts after a fixed amount of time, you can use a [CODEBLOCK] (datetime + X days) operator.
If you are looking for great job board templates to get your website up and running, we have put together a few great looking design kits. They use CMS collections to make integrating these automation with Make as seamless as possible.
Job Board Starter Pack by Memberstack
https://www.memberstack.com/freebies/job-board-starter-pack
This design kit is perfect for someone looking for a clean and simple template to get your website started. It includes all of the fields you’d expect to see while also providing the ability to dynamically sort (in the template it is by remote or in-office jobs). It also includes a search feature and can be customized to include other filter options.
The “Post a job” button at the top could connect to your CMS Collection, maybe first somewhere off-site like Airtable and then to the CMS Collection through Make. If postings are given a fixed lifespan (or different amount of time can be purchased by job posters), it is possible to make this entire process fully automated.
Crunchboard-Inspired Job Board
https://www.memberstack.com/freebies/crunchboard-inspired-job-board-template
This job board, inspired by Chruchboard, is a beautifully designed way to display job information to potential visitors to your site. It also includes the ability to dynamically sort and a search feature. It has many of the same features as the above site, with the “Post a job” button instead appearing in the column on the right.
Dribbble-Inspired Job Board
https://www.memberstack.com/freebies/dribbble-inspired-job-board-template
This is another starting design for your job board. It contains all of the same features. It also includes a “Featured Post” option which could also be integrated into your Make environment, depending on how you want to determine which posts are featured. For example, posts that have been on the site for a particular amount of time could be automatically featured in order to increase exposure and potentially increase applications.
Event Boards
For event boards, the process is largely the same. Typically, you will want to display upcoming events and automatically remove listings after the event has passed. On Make, using a [CODEBLOCK] (datetime) filter will also achieve this result.
Edge Case: One-Off Events
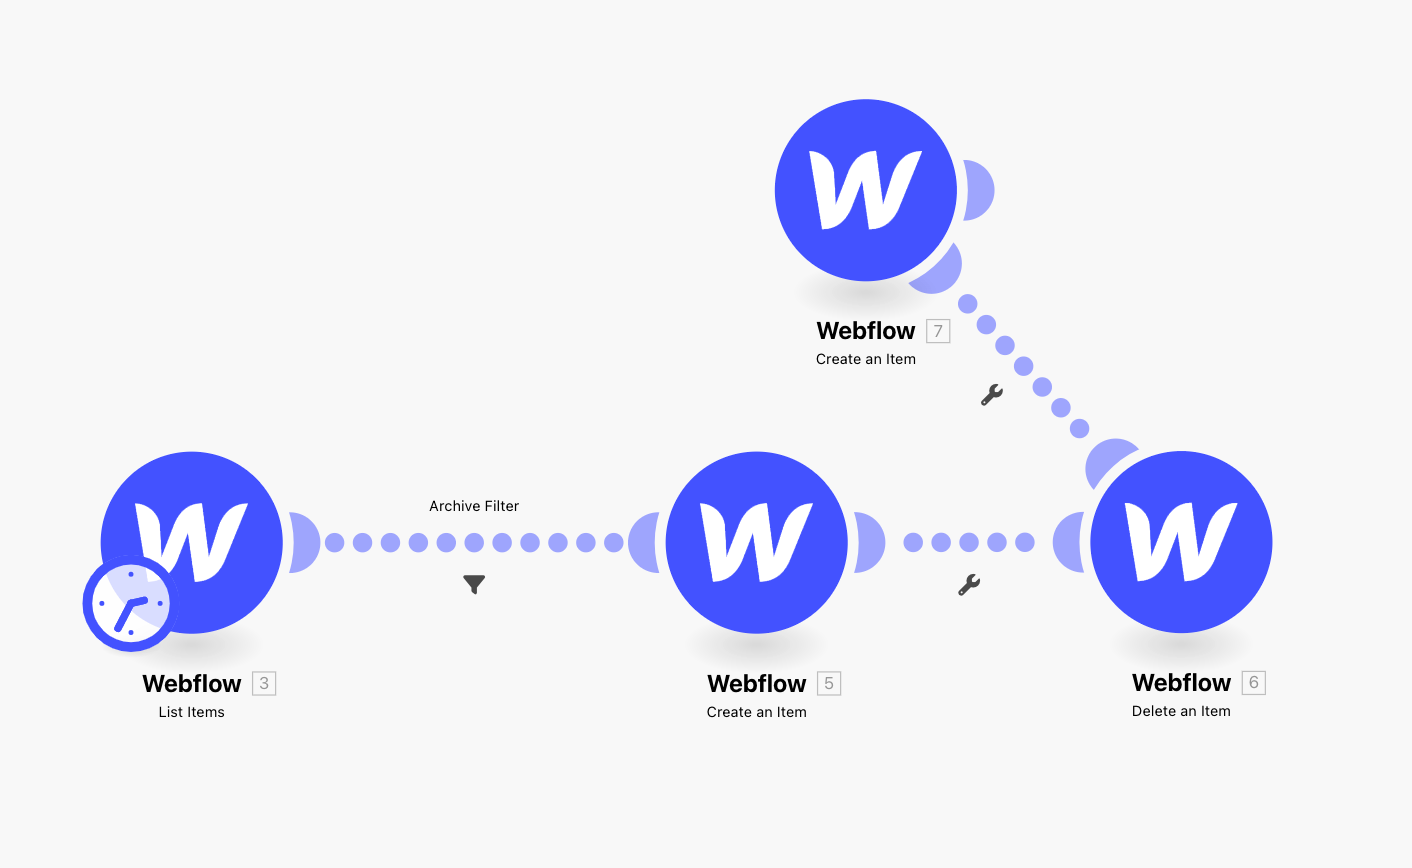
If you are offering time-sensitive opportunities or one-off promotional events, automatically archiving data is essential. It works much the same way as it would normally, except instead of just deleting the original archived posts, you can either create a new item or update an existing item.
This will let you keep track of all promotions that have been run in the past (for things like lower prices, special promotions, etc.) while still automatically displaying the non-promotional version of the event on your page.
On Make, this workflow might look like it does below, with the data for the non-promotional version either being pulled from another CMS Collection (which can live on your Webflow site) or from a fixed reduction amount (the “Price” field = Price from an earlier module + $100, for example). I’d suggest the first option, though, it is a bit cleaner.
Summary
Archiving your Webflow CMS items is a great way to keep your content organized and easy to manage. By following the steps outlined in this document, you can easily set up an automated system to archive your old items. Now, sit back and let Make do the work for you!


.png)
