Key Benefits
Improved security
Reduce the risk of unauthorized access to user accounts.
Accurate contact information
Ensure the email addresses provided by members are valid and active. Help maintain a database of accurate contact information, reducing the risk of sending messages to non-existent or outdated addresses = better bounce rates.
How to Verify a Member's Email Address
This article will show you how to A) require members to verify their email address during signup, or B) prompt them to verify their email after signup. Here's how to do it...
Enable Email Verification
Navigate to Email Settings in your Memberstack dashboard.
You can use this UI to preview, translate, and brand your emails. Your brand color and logo will be pulled from other areas of the dashboard.
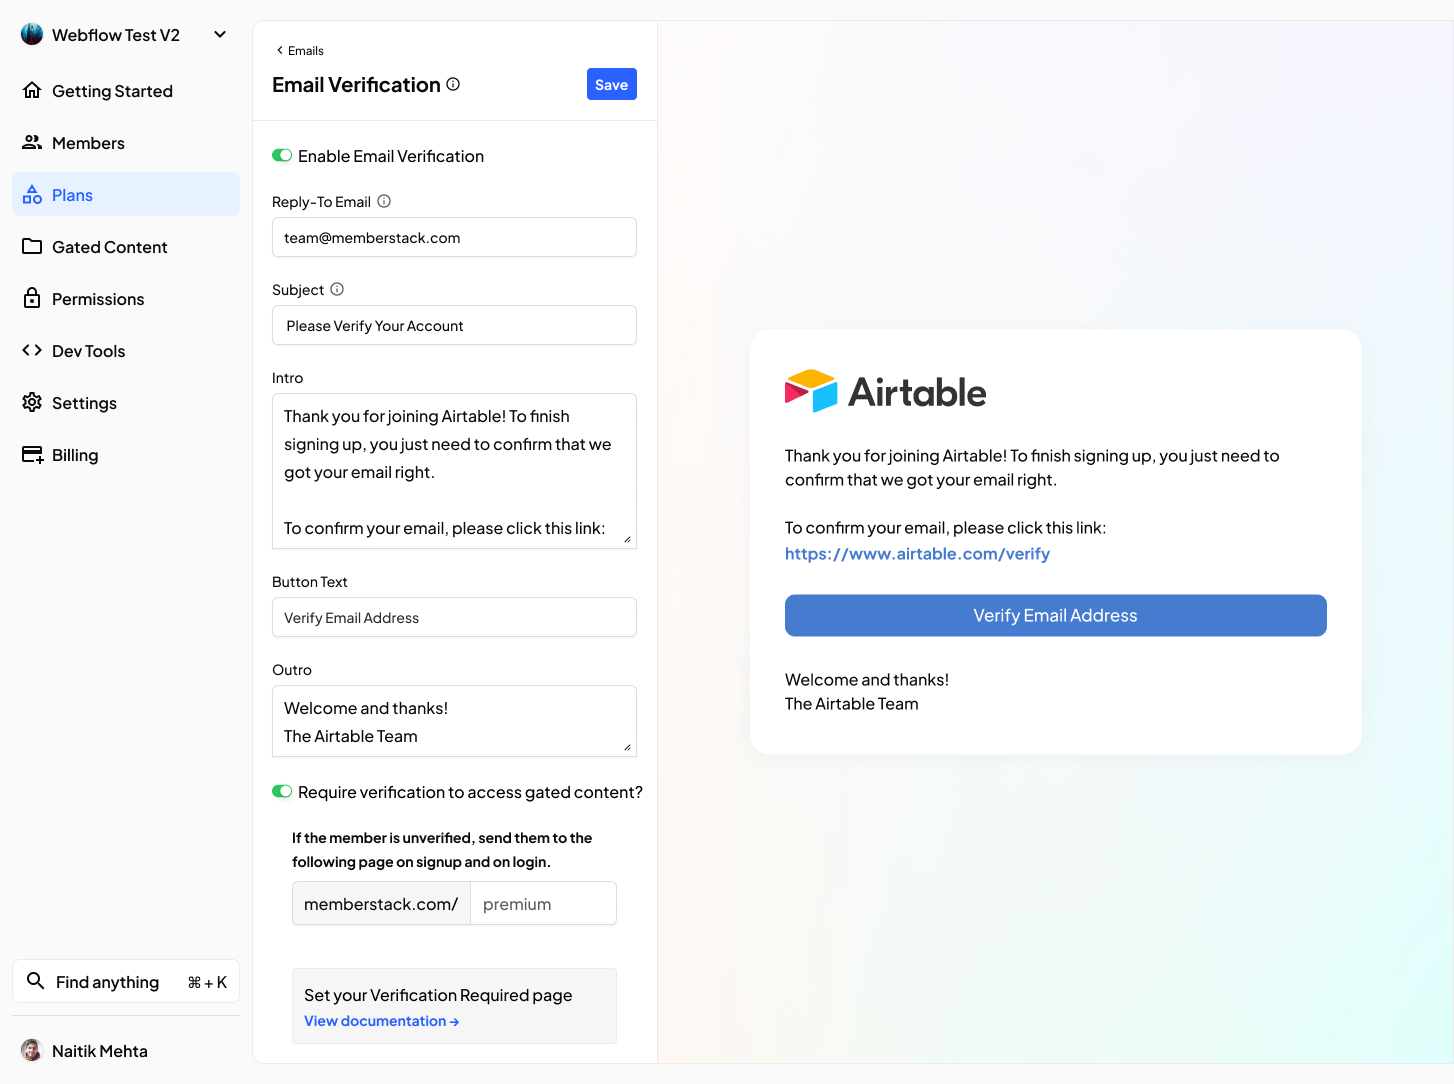
Require Verification to Access Content
Clone this Webflow project to copy and paste a basic email verification page.
Click the toggle at the bottom of the Email Settings page to prevent unverified members from accessing gated content. Create a "Please verify your email" page, and enter the page URL into Memberstack. We will redirect all unverified members to this page when they signup or log in.
Verification Success Redirect
What happens after a new customer verifies their email?
By default, Memberstack directs each new customer to their On Signup URL after they verify their email address. You can customize the On Signup URL by updating your default and plan-level redirects.
Redesign Verification Email Button
We automatically send a verification message to the address they used to sign up, but they can re-send the verification email if they didn’t receive it. Place the following data attribute on the button: data-ms-action="resend-verification-email".
Prompt Verification After Signup
Clone this Webflow project to copy and paste a verification prompt.
Disable the toggle at the bottom of the Email Settings to allow members regular access to your site.
You can then use the following data attributes to show and hide content from verified or unverified members.
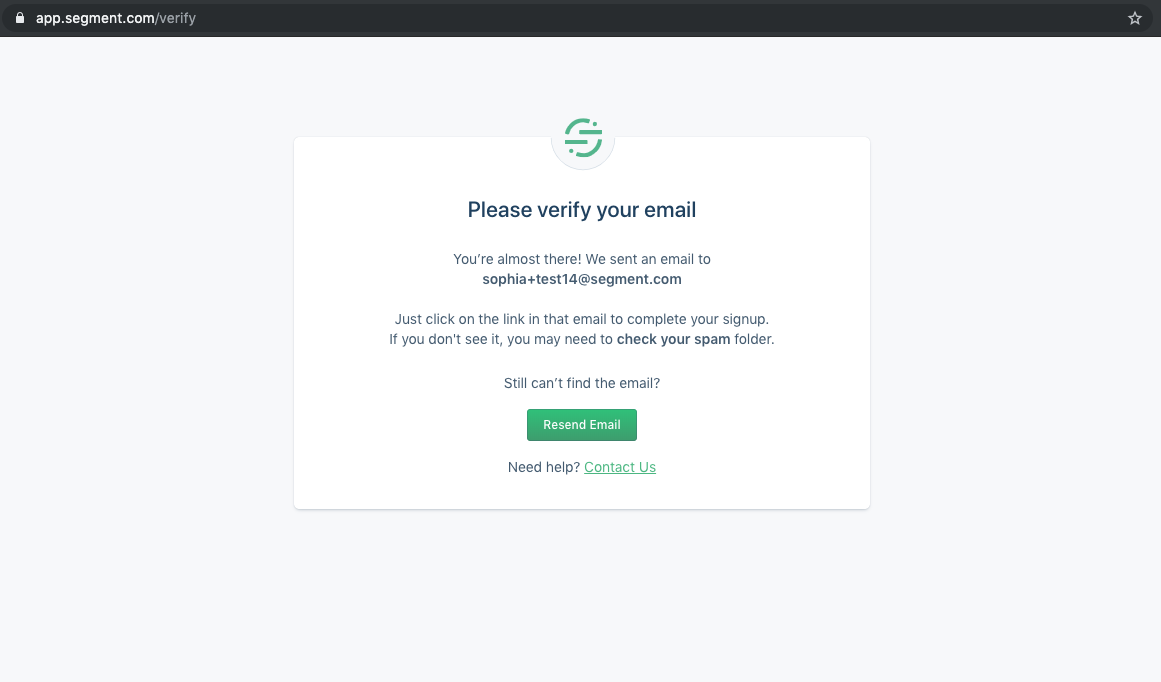
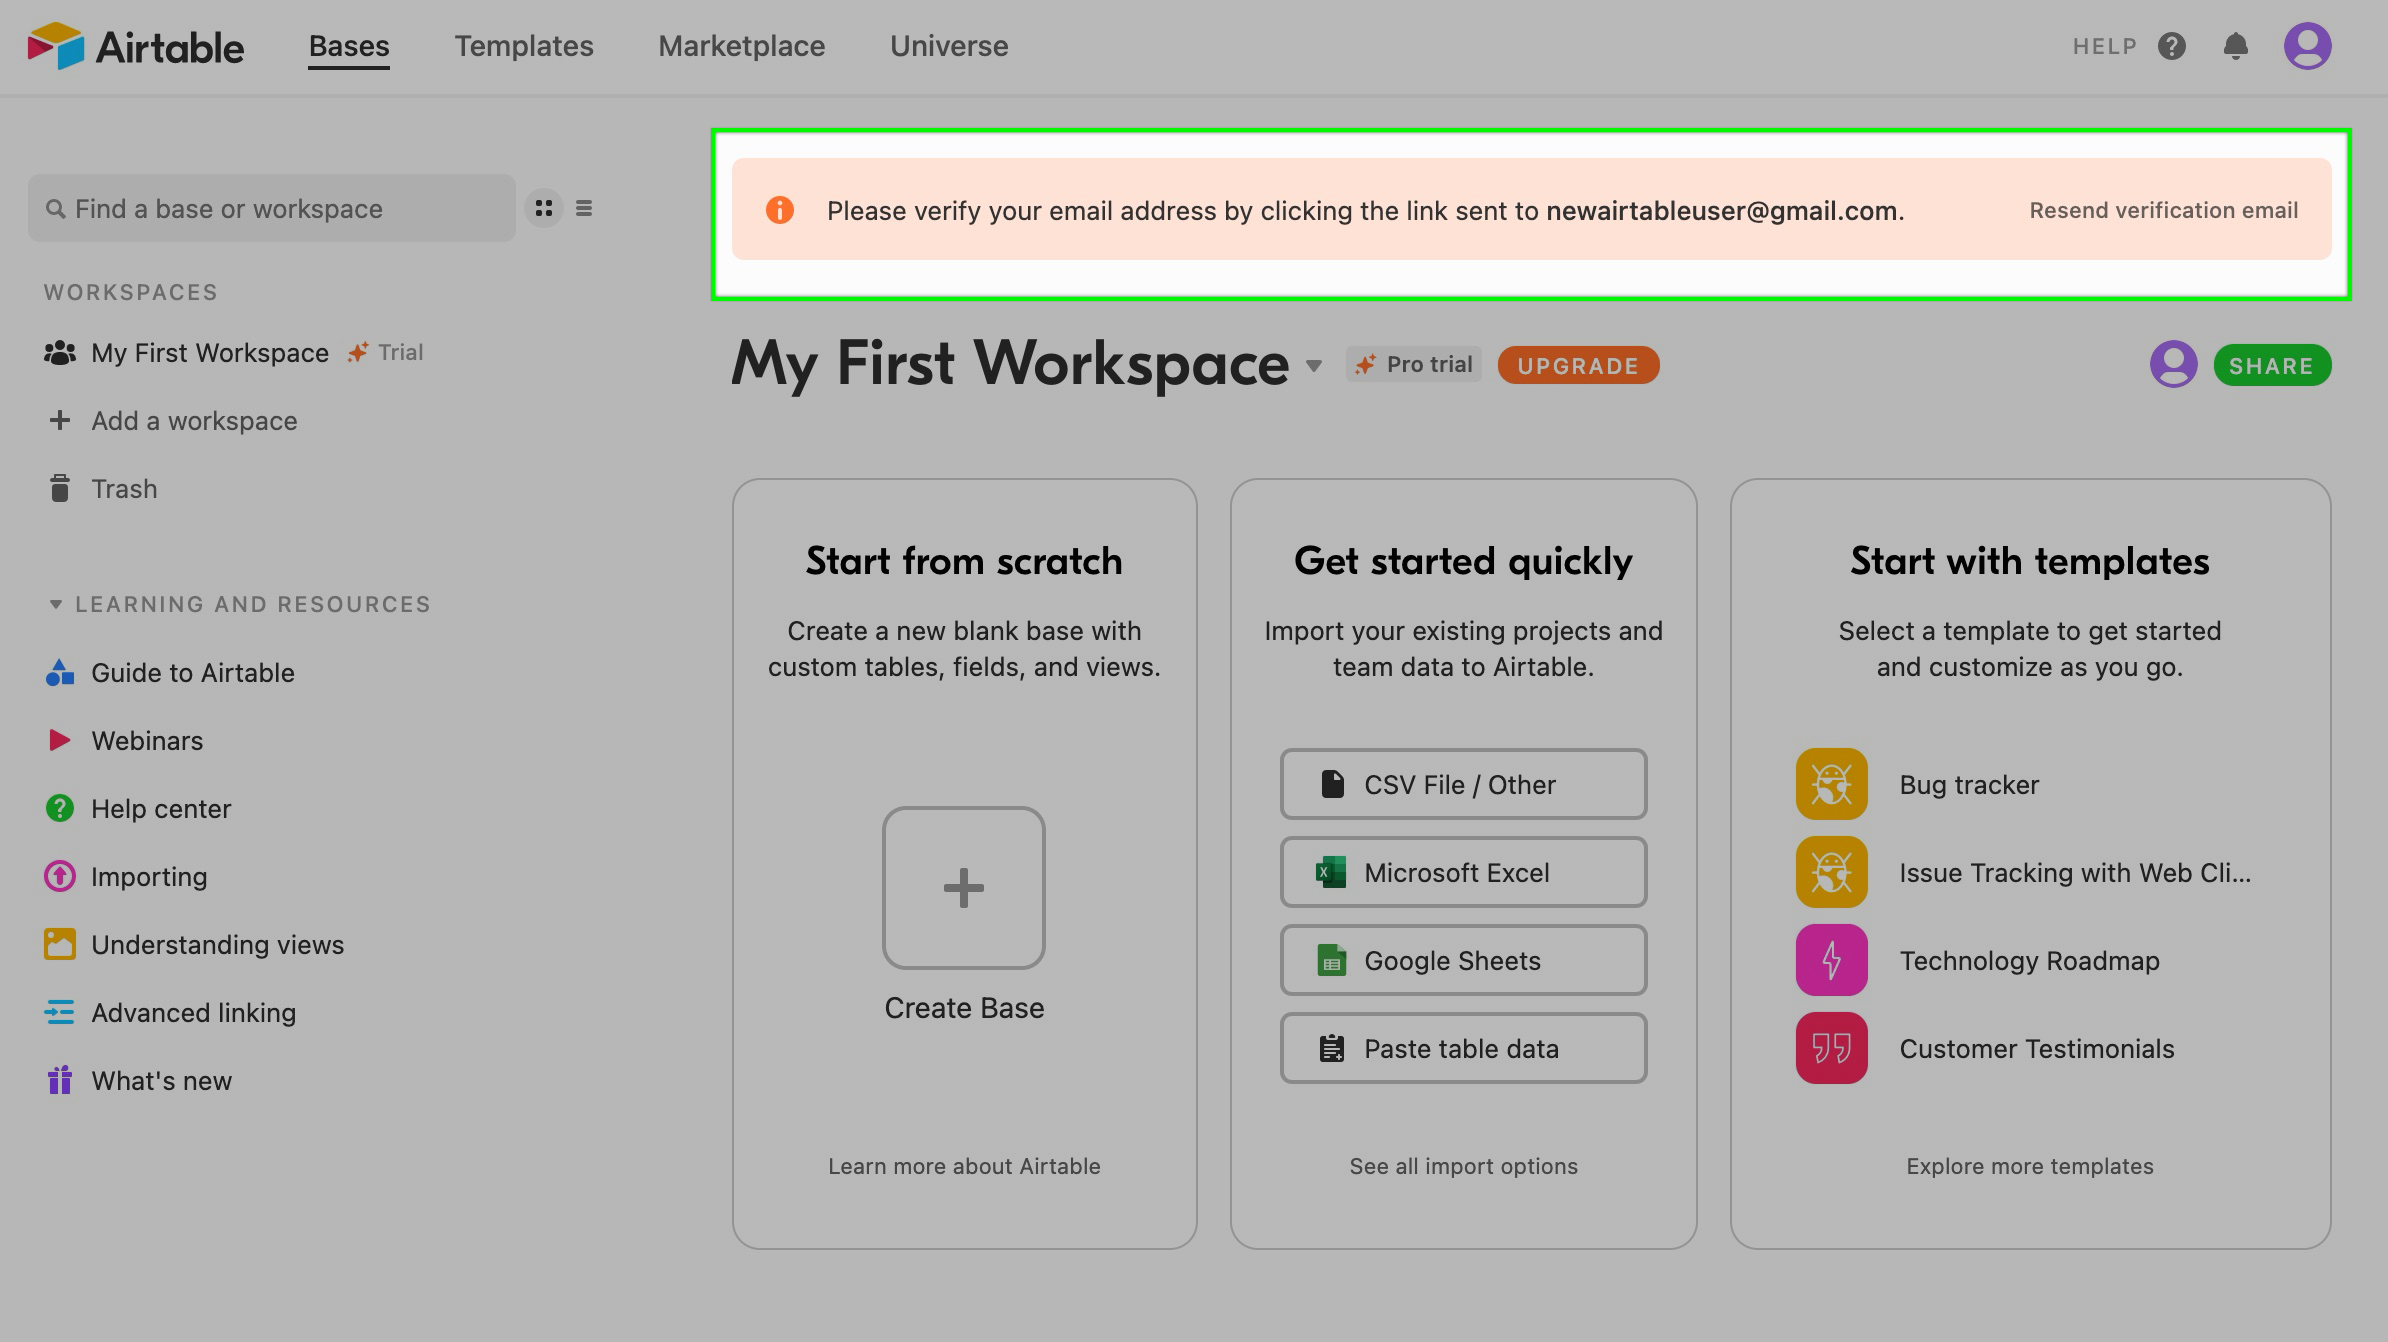
Use data-ms-content="!verified" to show an element to a member who is NOT verified (picture below).
Use data-ms-action="resend-verification-email" to allow members to send themselves another verification email (e.g. useful if they create an account several weeks ago).
Note: You can also use data-ms-content="verified" to show an element to a member who IS verified. This feature is less common.
Dashboard
You can check if a member has been verified or not via the dashboard.

White-labelling
You can change the "from" address by following the steps in this guide to while-label emails from Memberstack.