Key Benefits
Generate revenue upfront
Provide an immediate source of revenue for your business.
Encourage member engagement
Help create a sense of ownership and commitment among members, leading to increased engagement and retention rates.
How to Charge a Setup Fee?
In this article, I show you how to add a setup fee to a paid plan.
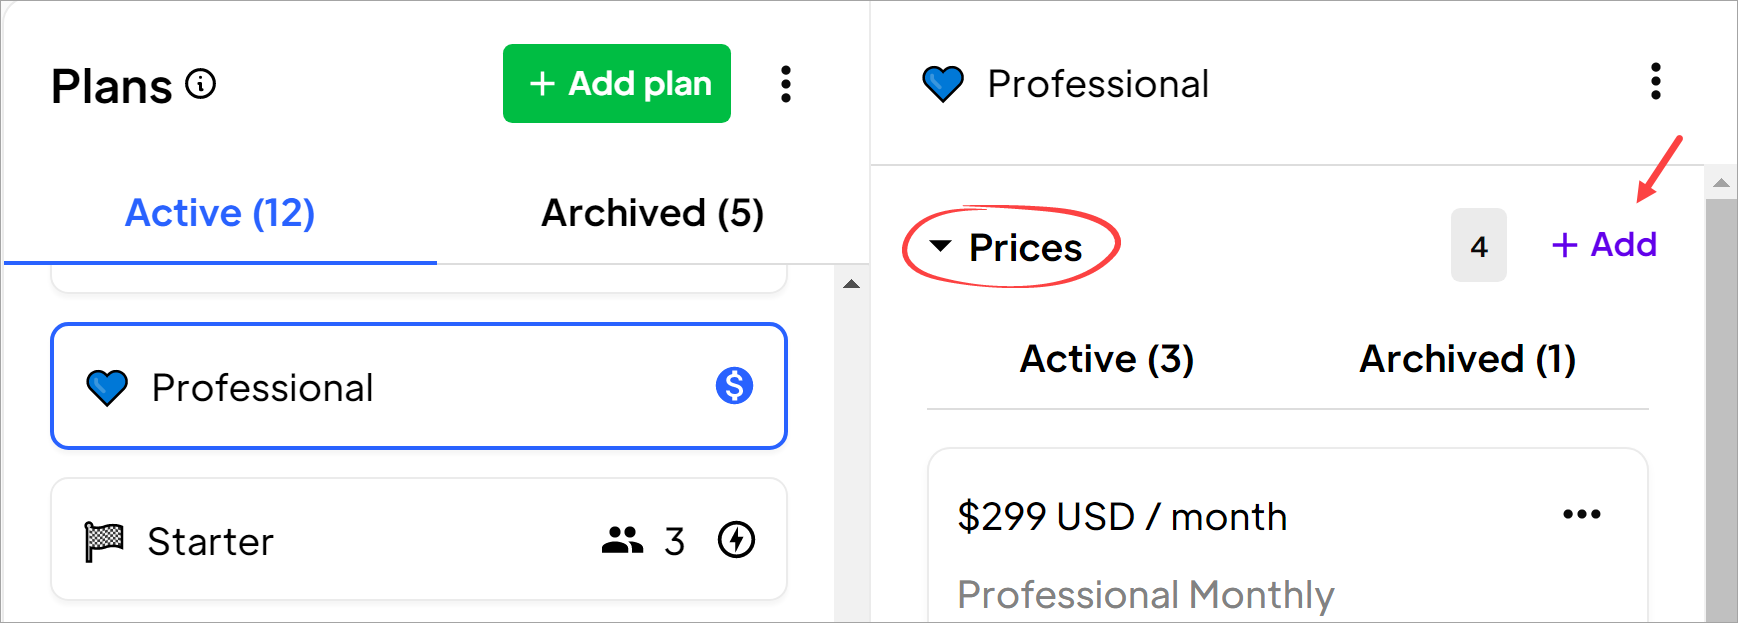
- Go to the Memberstack dashboard and click Plans on the side menu.
- Select a paid plan.
- Open the Prices folder and click the + Add button. A new page displays.
Adding a Setup Fee
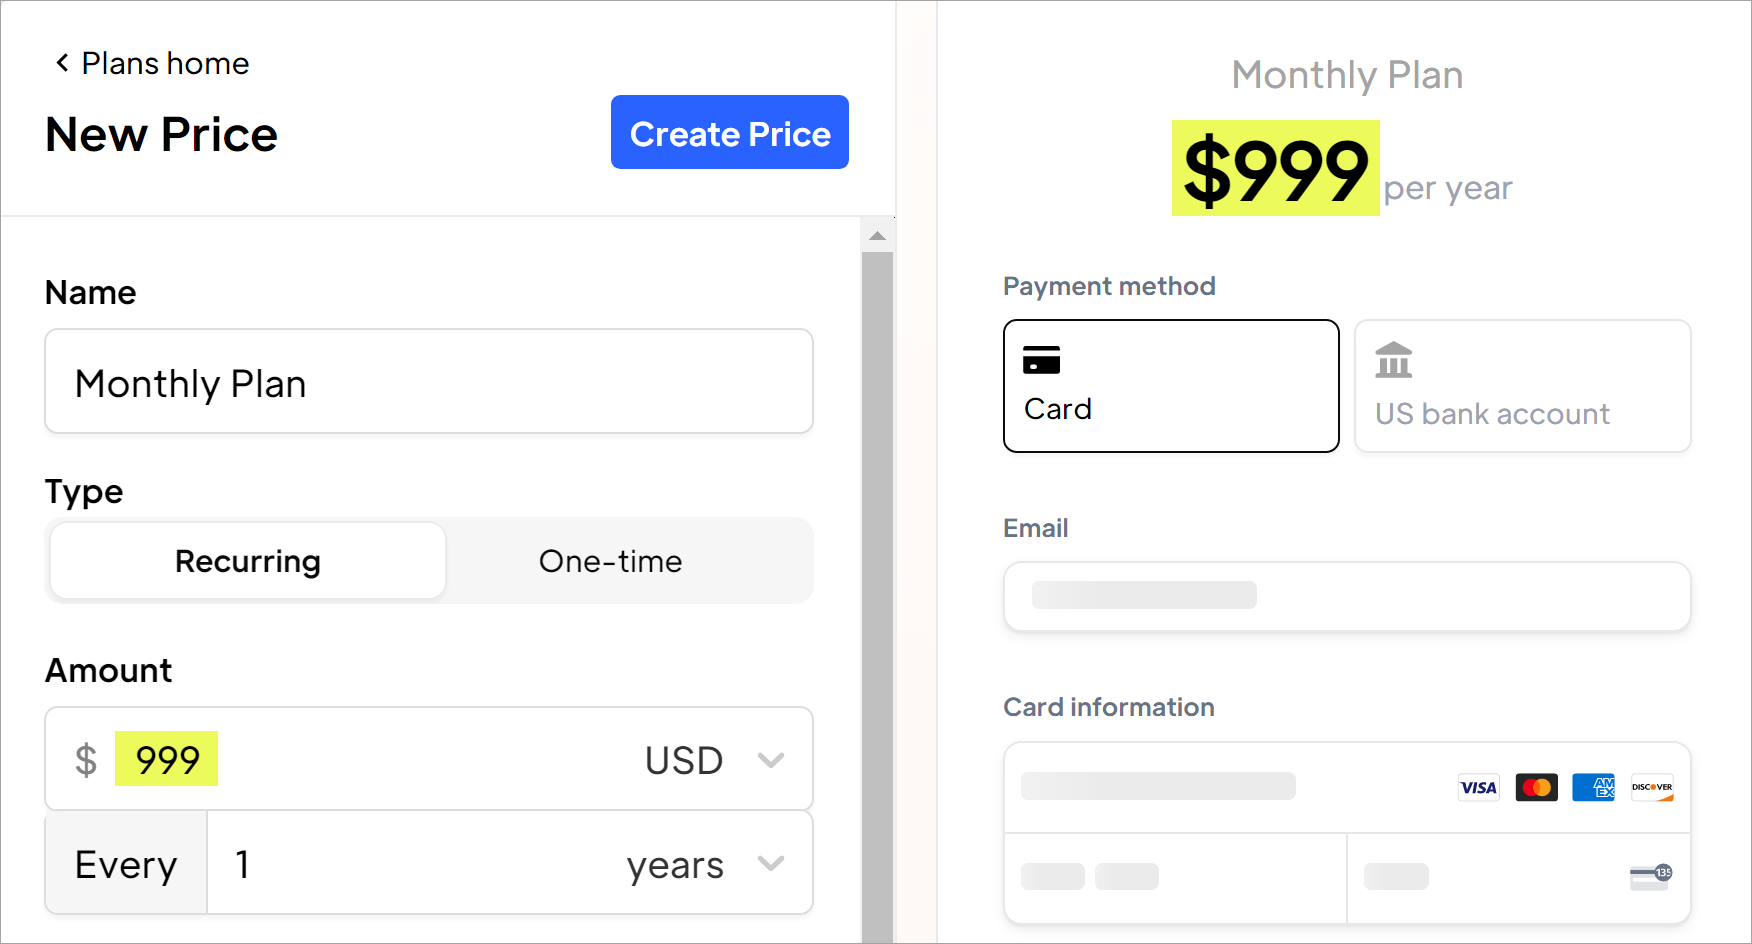
The new page has blank fields. Fill in the top part of the page with your own fee and payment structure. In this example, I set a recurring annual fee of $999.
Setup fee
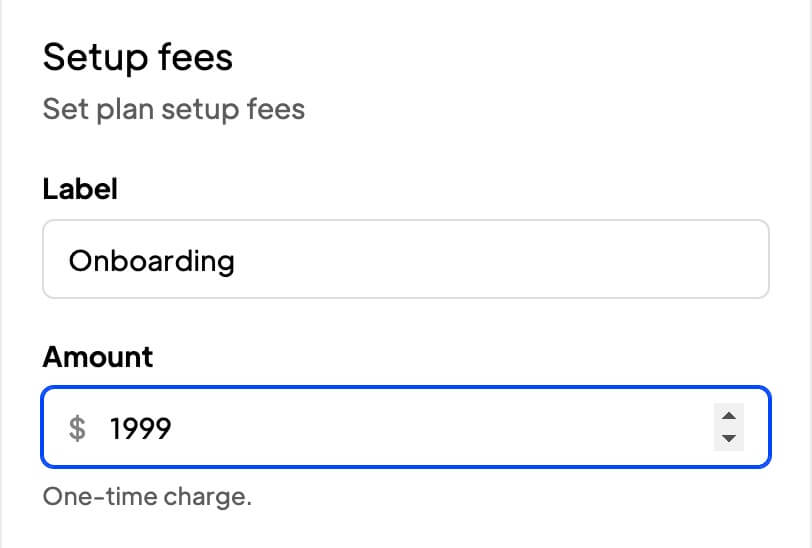
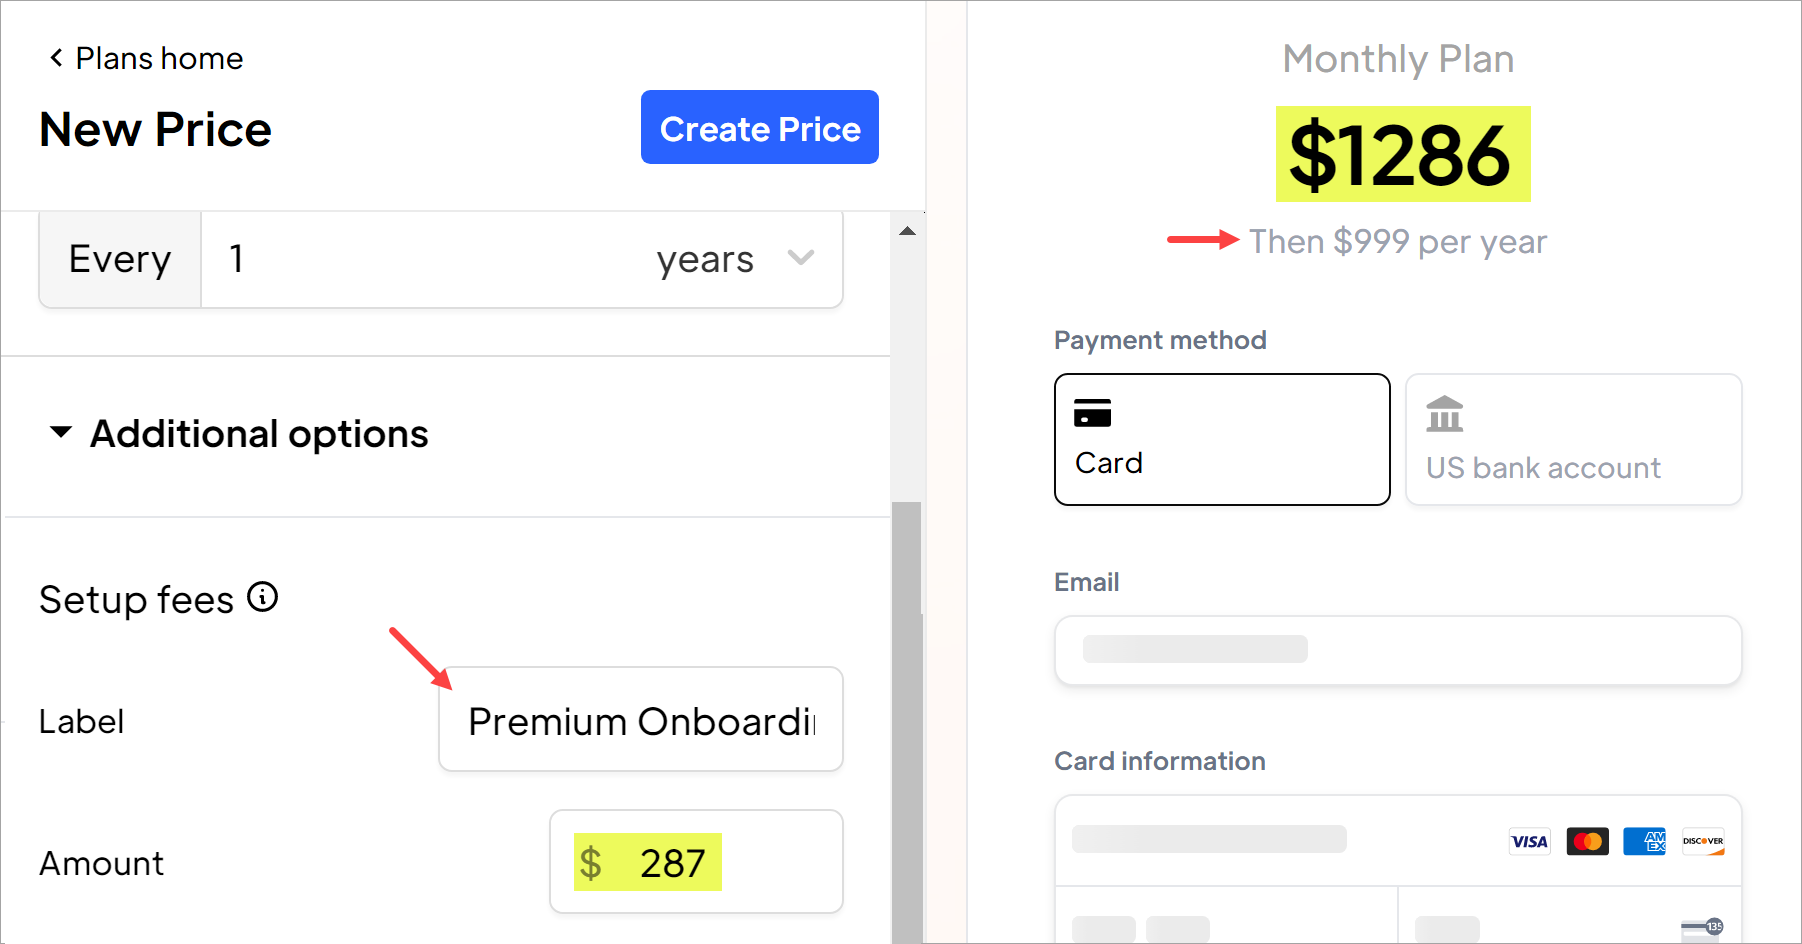
Scroll down to the Setup fees heading. Enter a name for the label and an amount. The checkout page automatically updates the first payment total and displays the recurring fee.
Once it all looks good, go to the top of the page. Click the Create Price button and then Create new price in the confirmation popup.
Check the Results
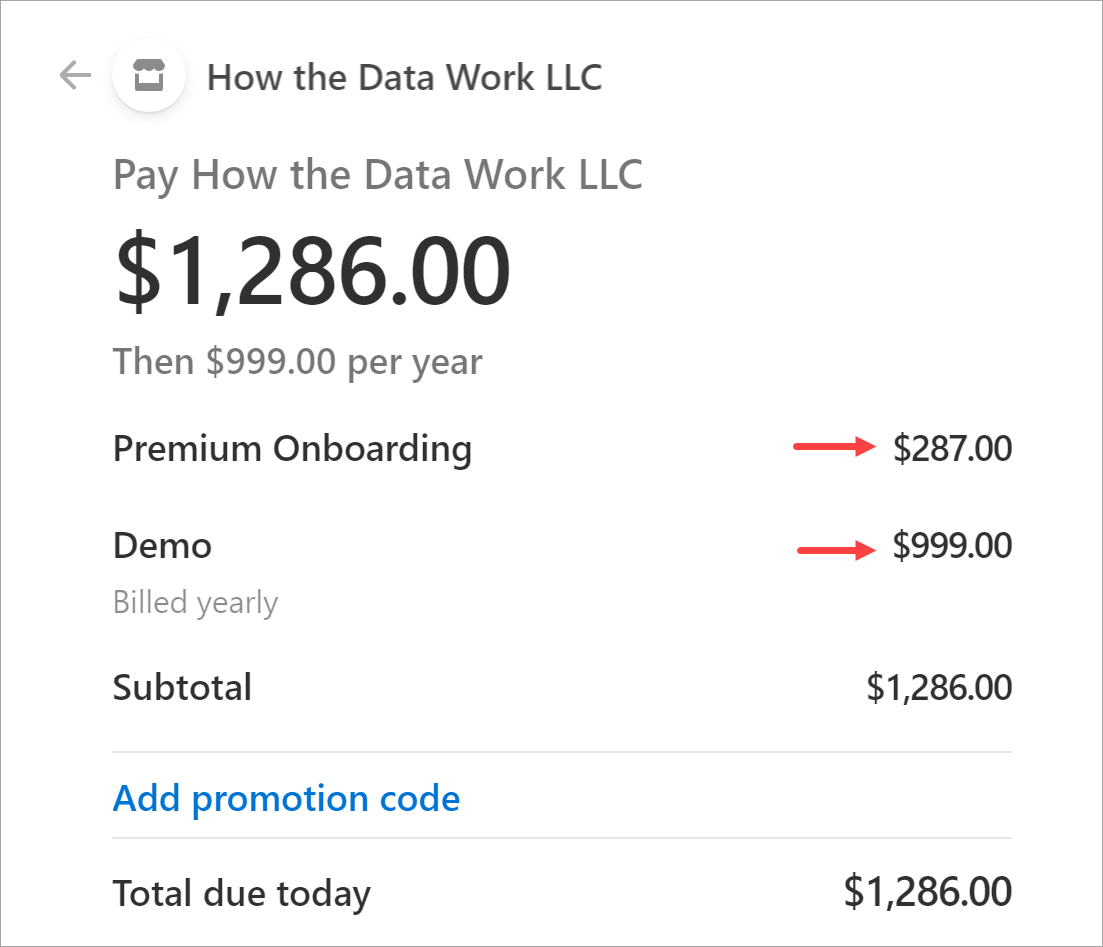
Go to your site's checkout page. You'll see the setup fee listed as a separate line item, which means it isn't included in the annual recurring fee.
That's it.
Now you're ready to charge a setup fee.
