How to Use Memberstacks Hosted Content Feature
This article shows you how to use Memberstack's Hosted Content feature. This handy tool lets you control access to gated content based on the user's logged in status. If, for instance, a user logs in to their Webflow account, the page displays an active download button. For logged out site visitors, Webflow disables the button.
We'll also show you how to expand this tool by adding a secured menu link that only displays only for logged in users.
Creating a Logged In State
The first step is to create a logged in state for Webflow users. In this example, the UI is a Download button with an attachment.

Once that's all set up, we need to publish the site, go to the published page, and copy the button’s HTML.
- Right-click the element you want to store in Memberstack.
- Select Inspect.
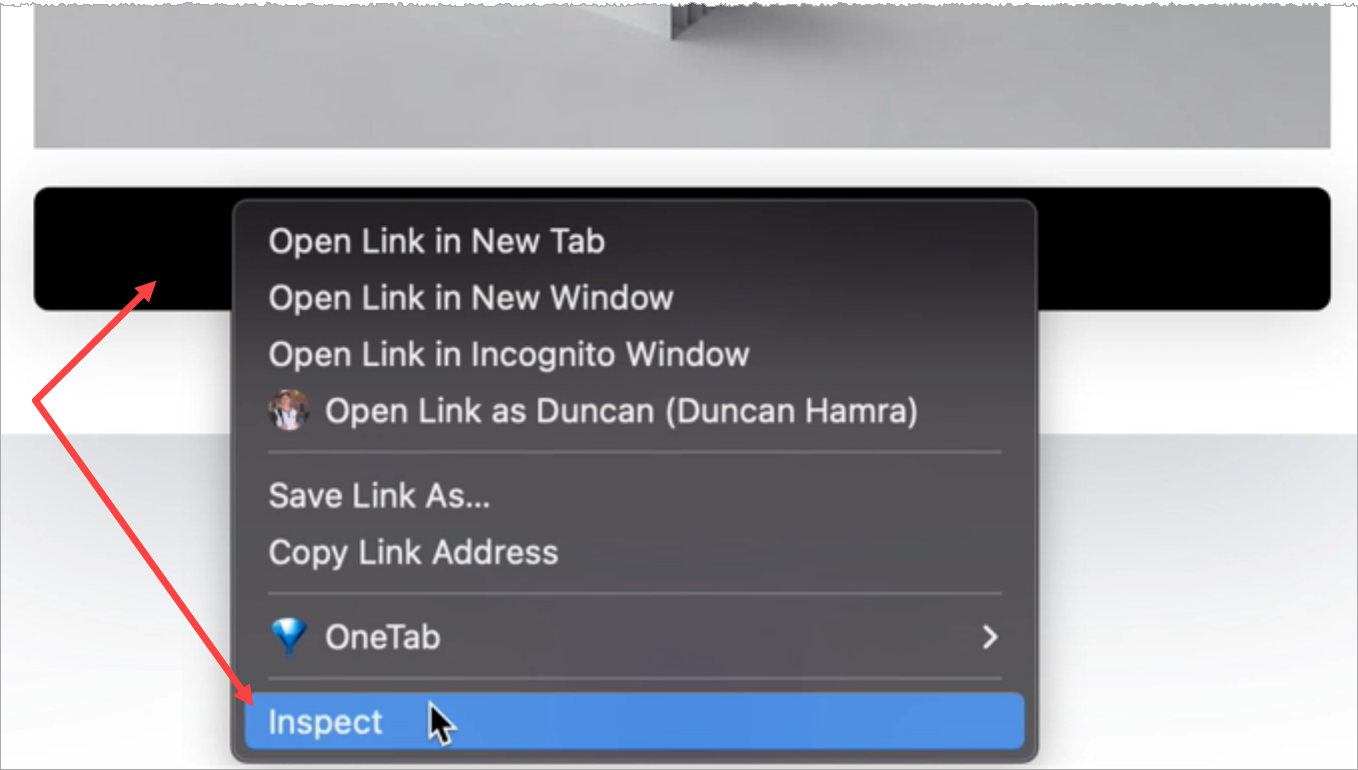
- Go to the Elements panel and copy the download button's HTML.

Setting Up Memberstack
Go to your Memberstack account.
- Click Gated Content on the side menu and then the Add button.
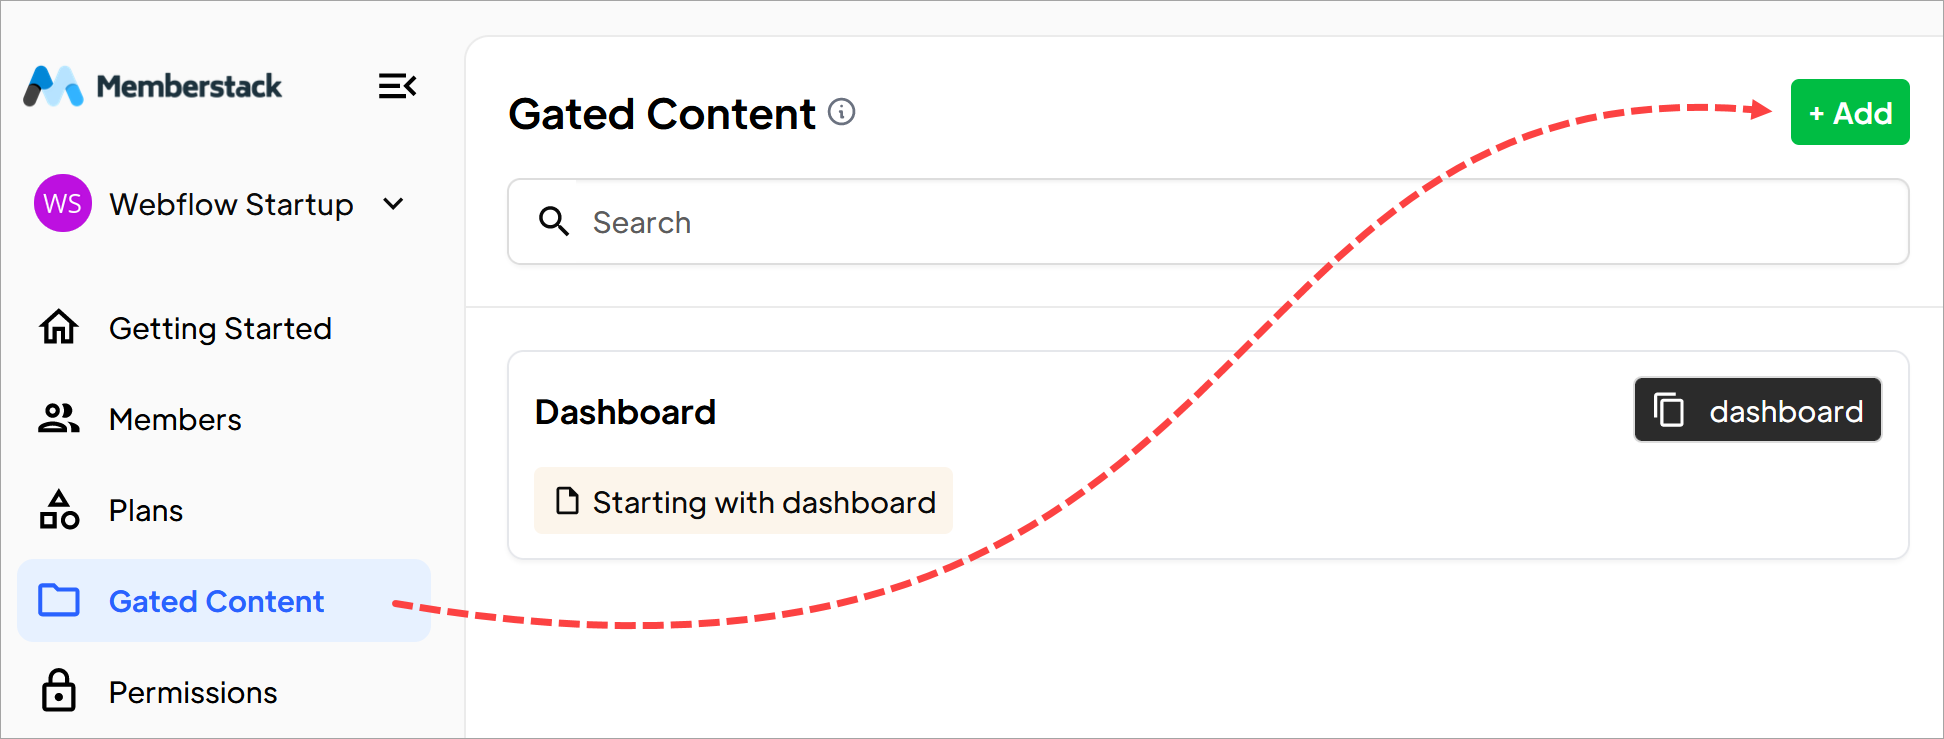
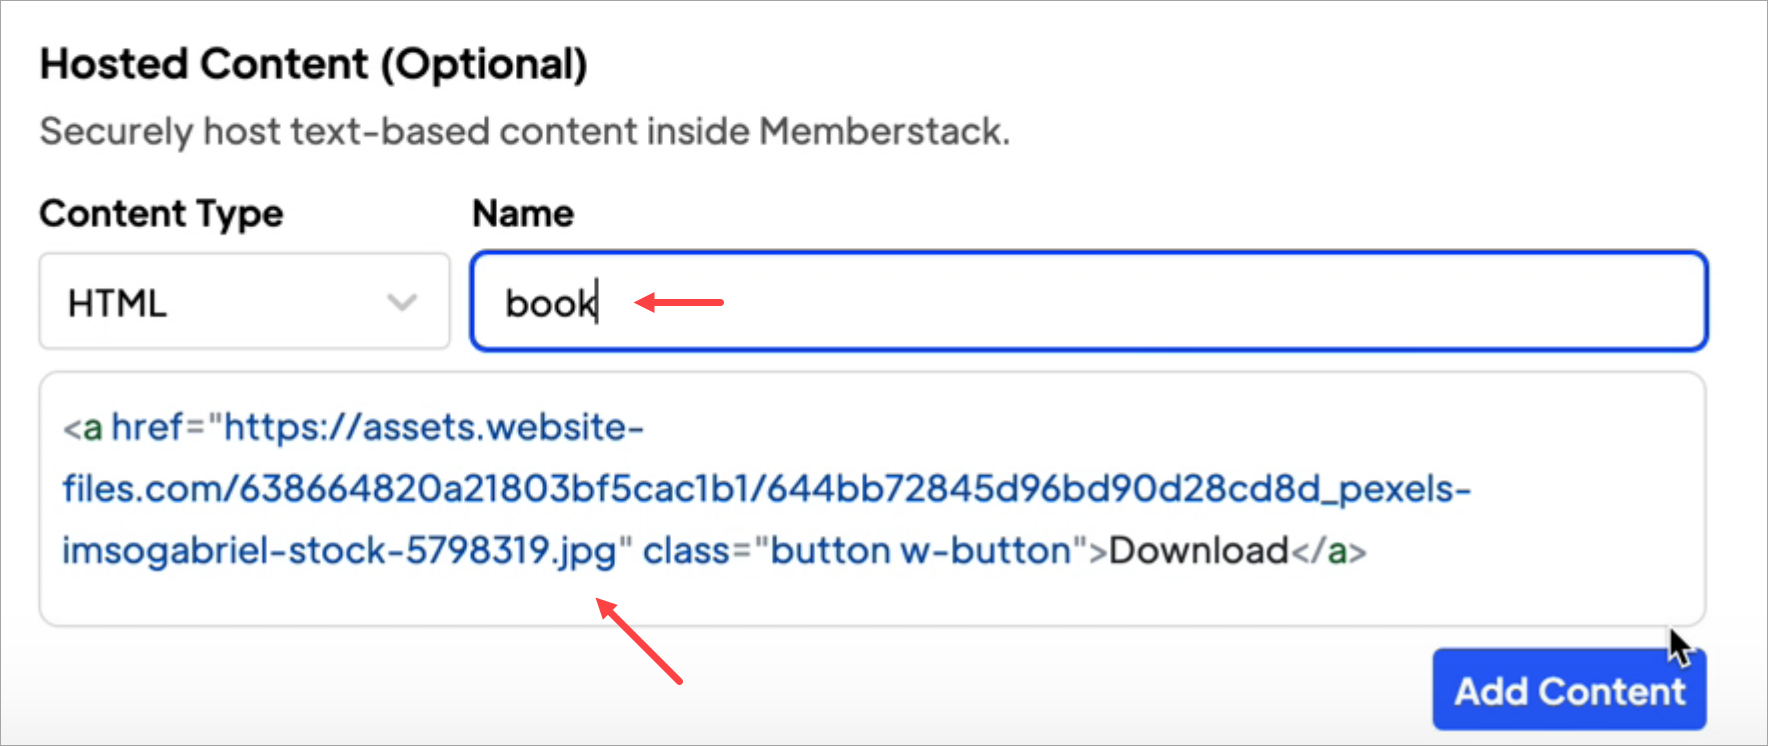
Scroll down to the Hosted Content (Optional) heading.
- Make sure the Content Type field shows HTML.
- Paste the Webflow HTML into the field.
- Enter a name for the content.
- Click the Add Content button.
To save the content, you'll need to fill in the remaining required fields. Enter placeholder info if needed.
Creating a Loading State
Now create a loading state on Webflow. This state displays the same download page but removes the secured content.
- Go back to the Webflow download page.
- Select the hosted element on the canvas.
- I recommend replacing any sensitive information, content, and links with placeholders. Whenever possible, try to keep the classnames the same so they are saved in Webflow.
- Your placeholder content will not be visible for long (usually less than half a second), but it's still wise to make it look nice.
In this example I removed the download link and changed the button text.
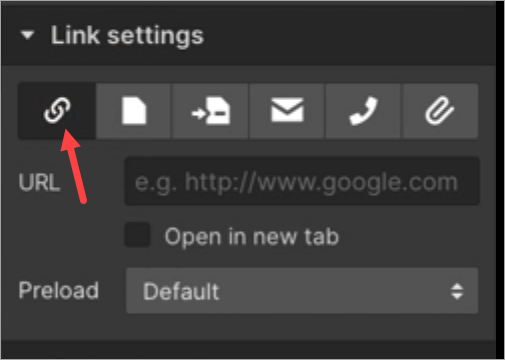
- If a site visitor clicks the button on the live page, nothing happens.

Adding an attribute
Almost done!
- Go back to the Memberstack site.
- Go to the Hosted Content section.
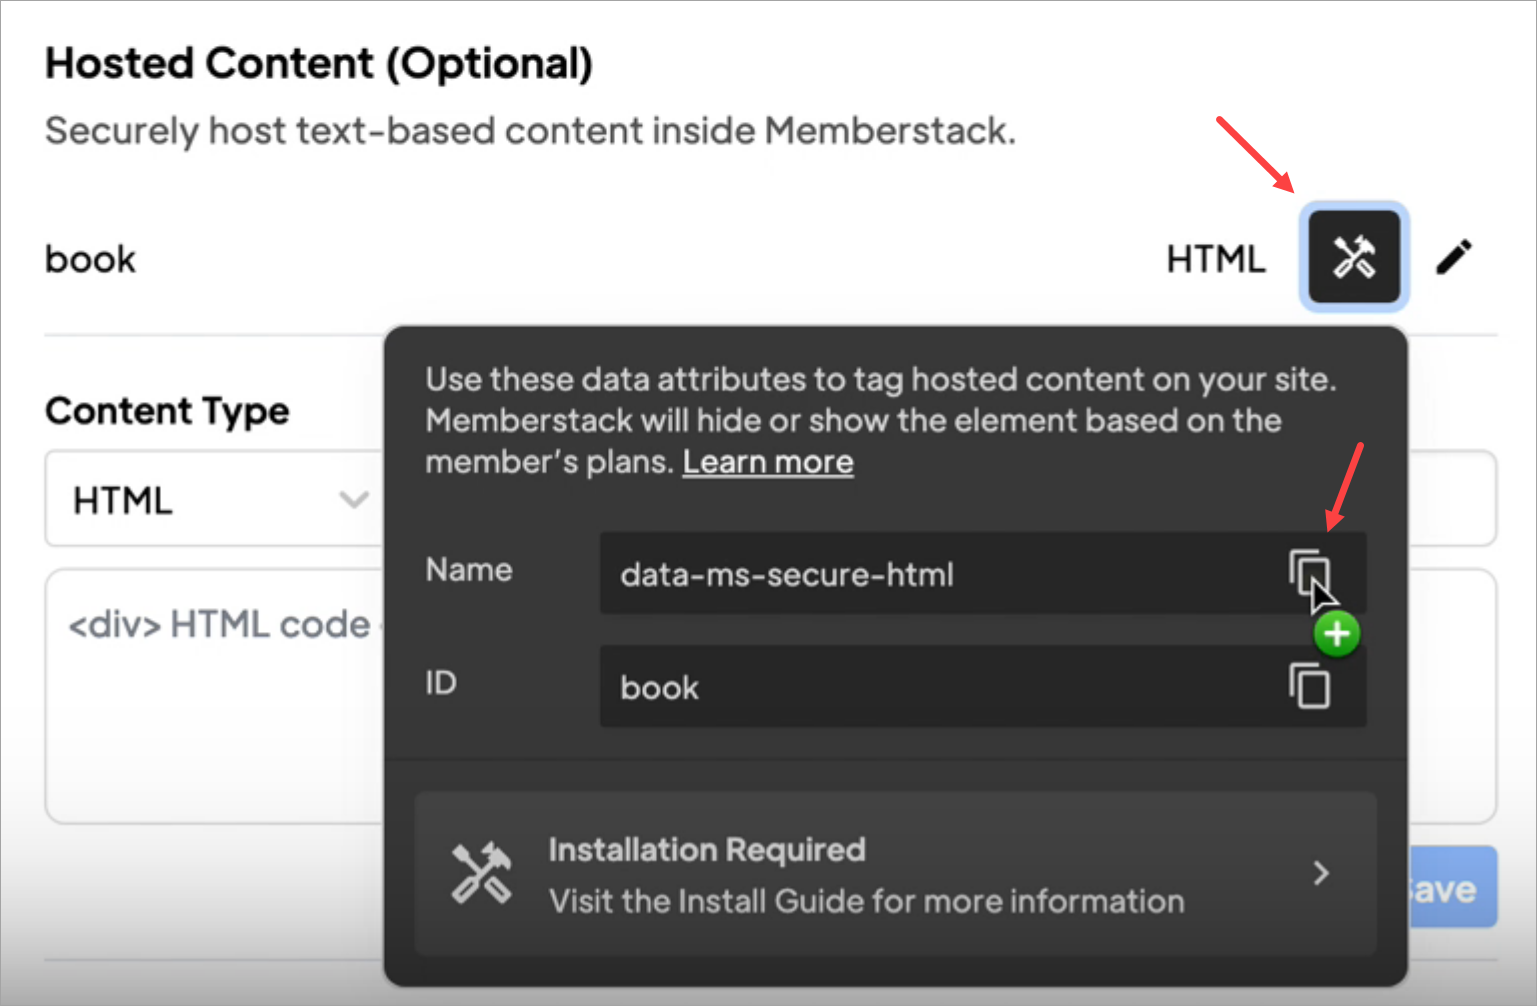
- Click the HTML install button.
- In the popup window, click the copy icon
Go back to Webflow.
- Select the button element.
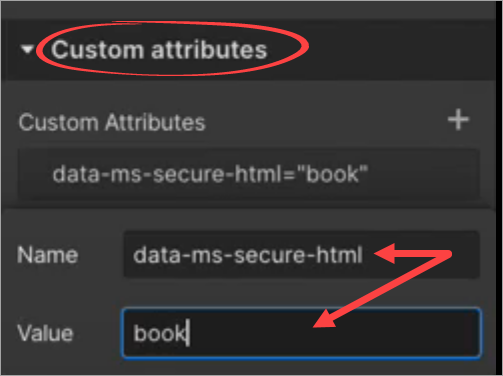
- Go to the panel on the right and open the Custom attributes folder.
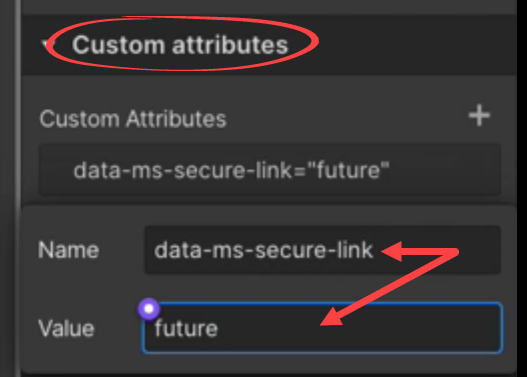
- Paste in the Name and Value attributes.
- Click Publish.
Test the Link
Go to the live Webflow page and log in. Webflow displays an active button and download link.

That's it.
You created a button with a secure link to gated content.
Adding a Secure Link
This feature lets you dynamically insert links for members. The link will only display for logged in members.
Go back to the Hosted Content section in your Memberstack dashboard.
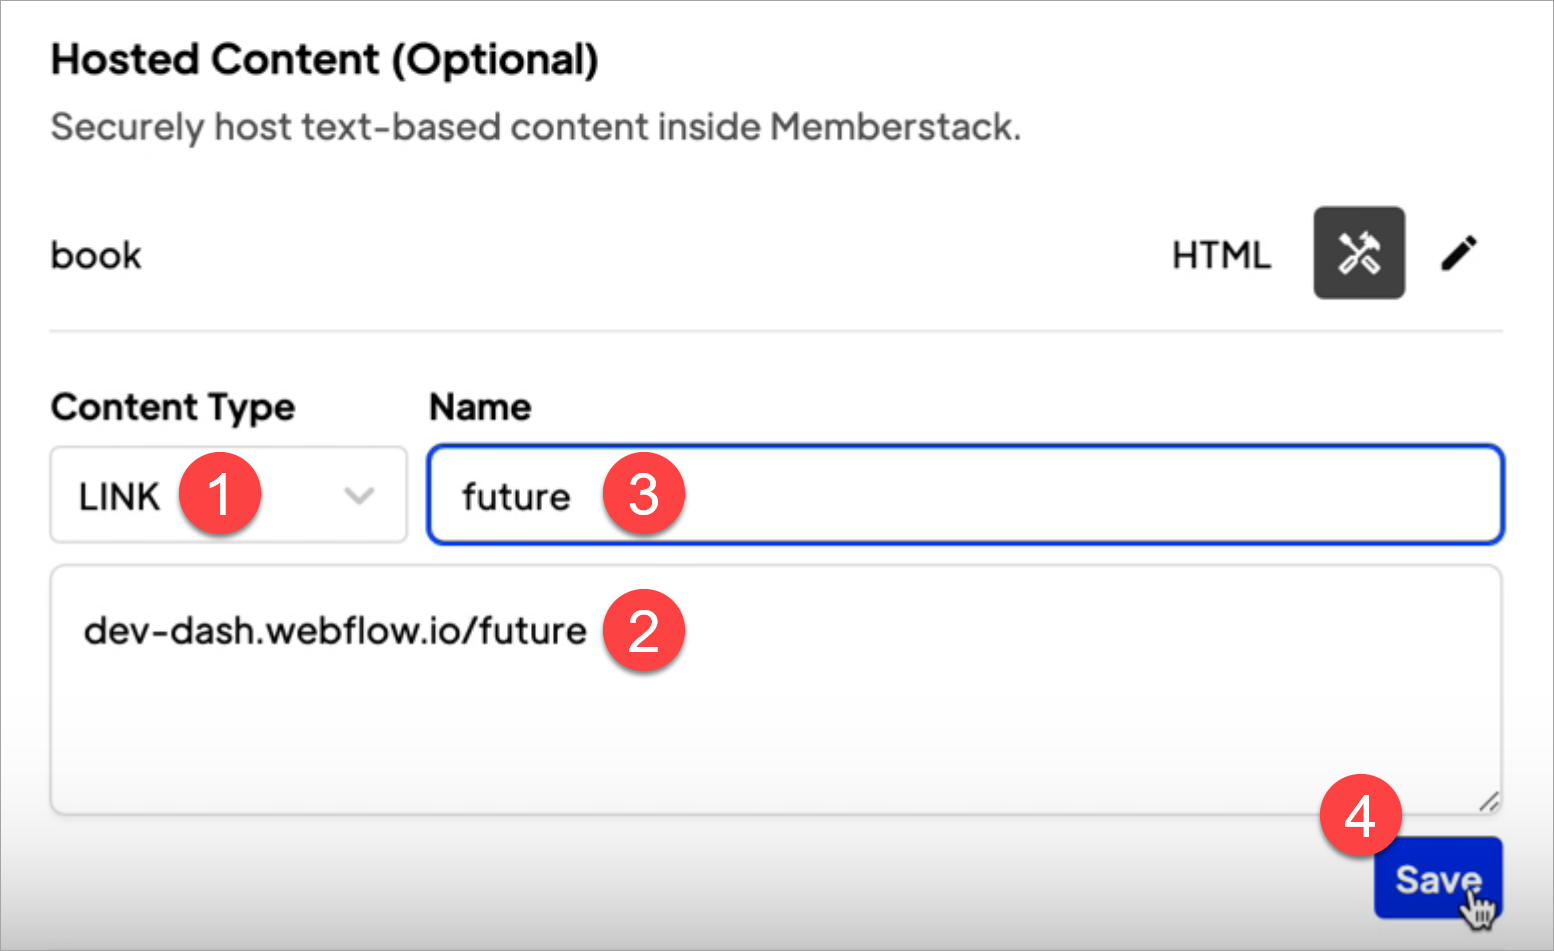
- Click the Content Type field and select Link.
- Paste in the secured page URL (Download, Dropdrop box link, Youtube video, etc.).
- Add a name for this link.
- Click Save.
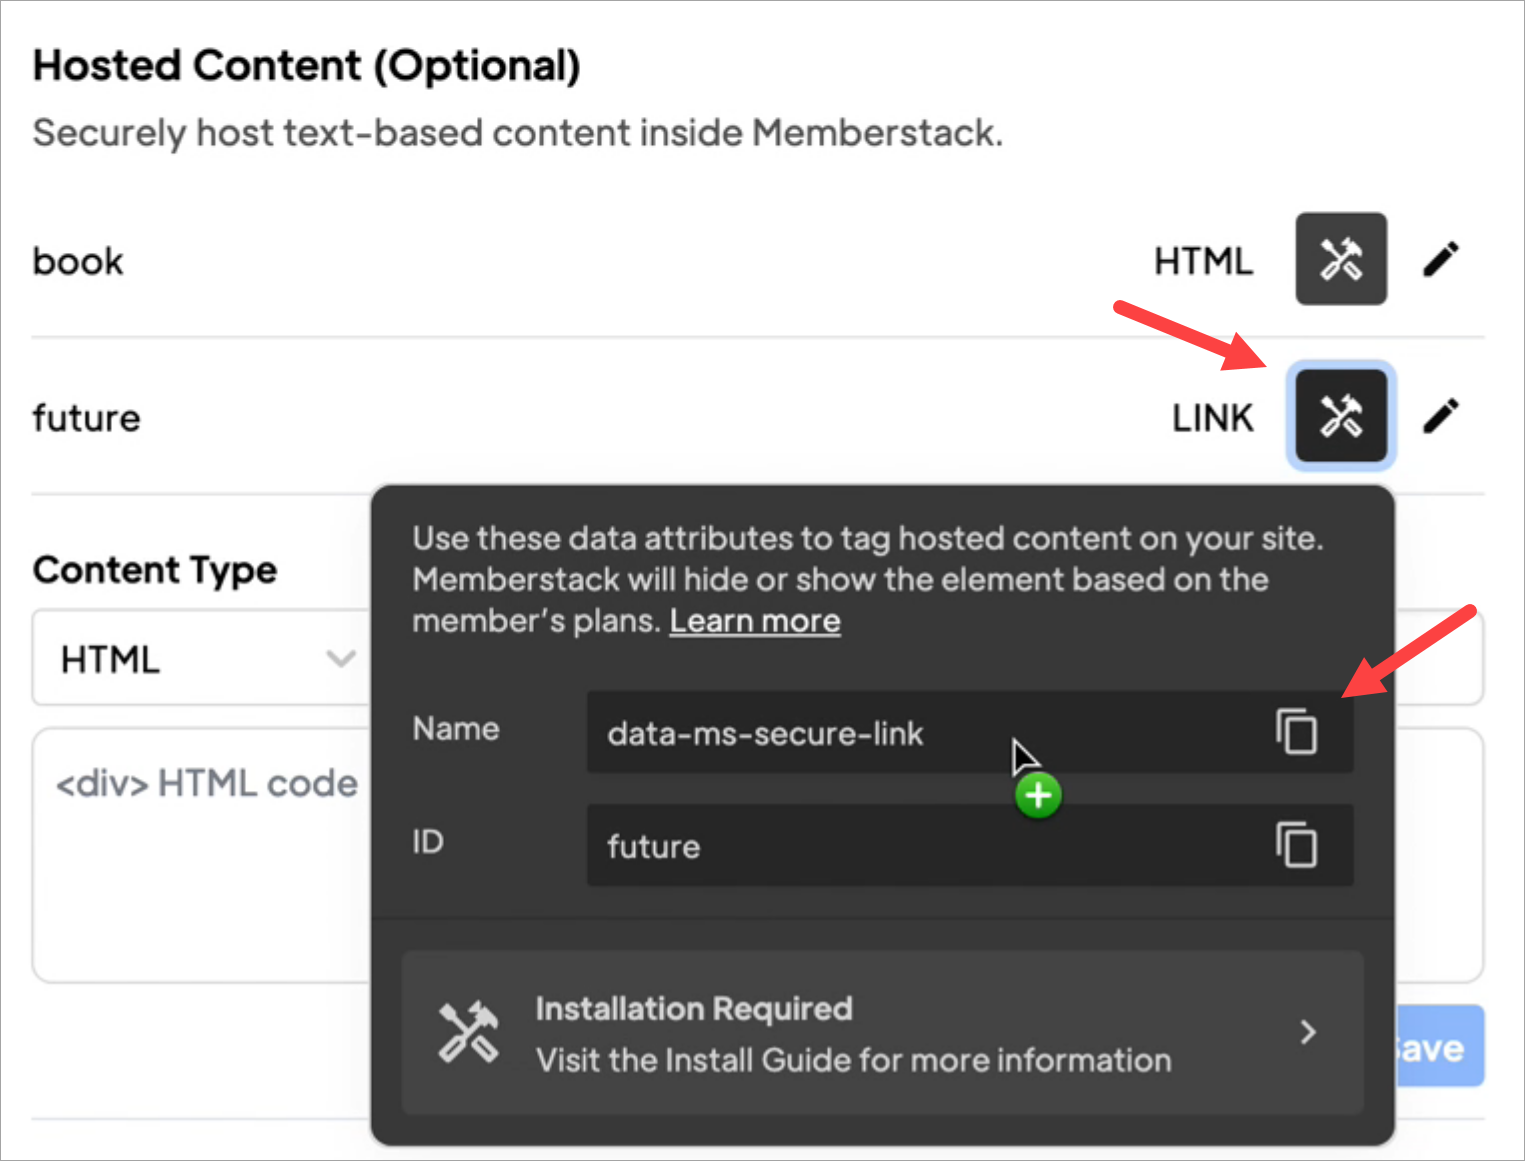
- In the popup window, copy the data attributes for this secure link.
- Next, go back to Webflow. And add a link to your site. In this example, I added a link to the navbar on my marketing site.

- Open the Custom attributes UI.
- Paste in the link attributes.
- Click Publish.
- Go to the live page and log in. Webflow displays the secured menu link.

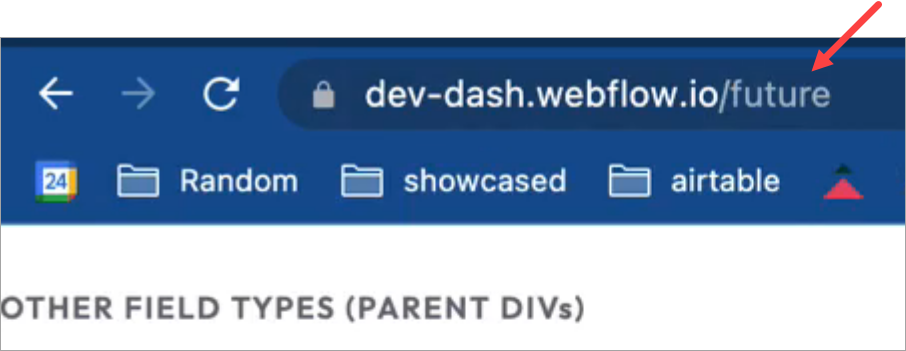
- When I click the menu link, Webflow opens the correct page.
- When I log out of the site, Webflow removes the secured menu link.

That's it.
Now you know how to create links for secured content that can be added to download buttons or a nav bar.
